


----------------
My kids love a good Nerf gun battle. Especially when Mum and Dad joins in. Then it's the best apparently... I suspect it might have something to do with the fact that Dad can take a bullet without crying and Mum picks up the bullets and distributes it evenly across the army ;-)Since I'm the chief-bullet-picker-upperer, I decided to concoct them each an ammunition belt in the hope that if they store it on them, I might get promoted to maybe something easy like "spectator"!
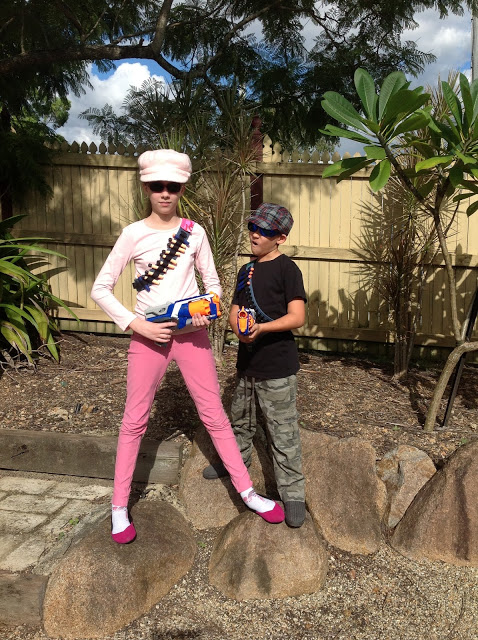
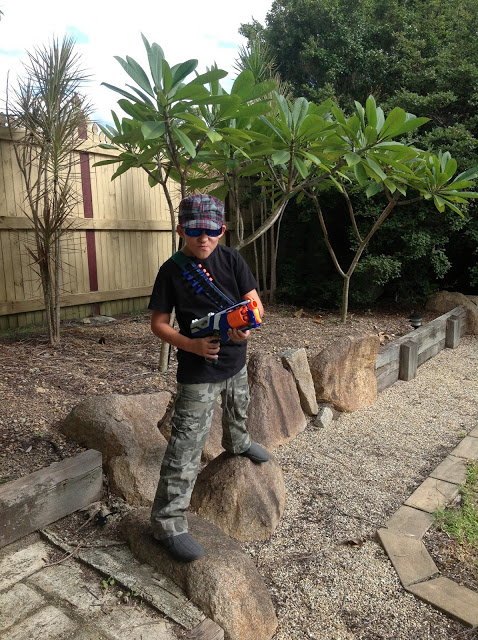
They were quite impressed with Mum's effort, I'm pleased to say :) Celine, my little hoarder, made sure she had the most bullets loaded onto the belt for the next round, Michael understood that a fully loaded gun will come in much more handy. That's boys for you.. and of course C should know by now that pink isn't exactly the best choice for camouflage!
It was a quick and easy sewing job and I'm happy to share it with you all. Feel free to pin the tutorial but please do not pin the photos of my kids!
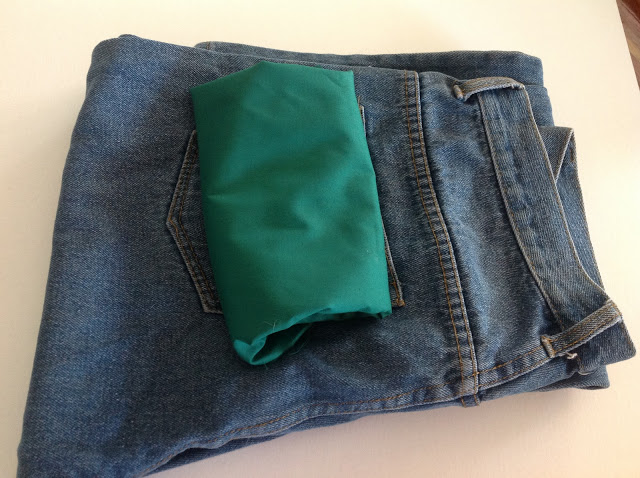
I made the belt from the leg of an old denim and used some cotton scraps for the shoulder strap. That way the belt is sturdy but also soft across the shoulder area.
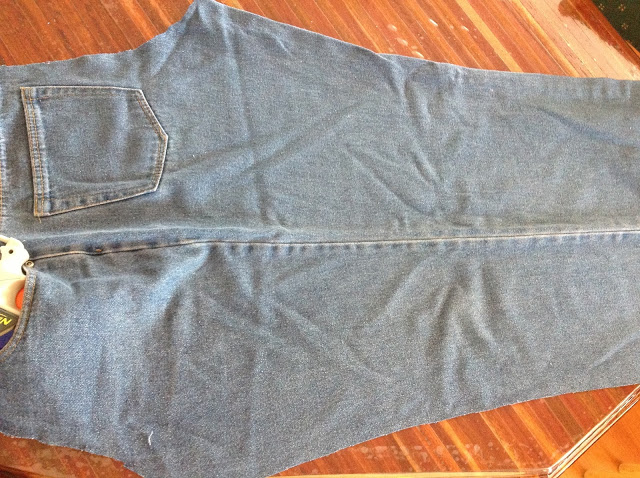
I measured them across the body, 31 inches for my 8 year old and 37 inches for my 11 year old. The next step was to cut the strips from the denim pant leg, I made it about 4 and a half inch in width, seam allowance included.
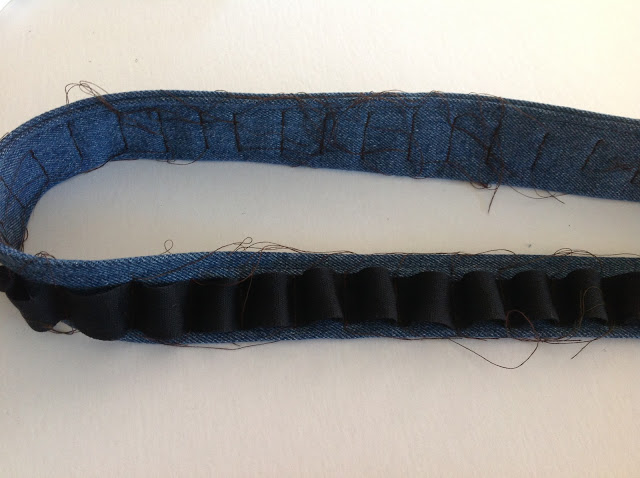
Next, iron the seam allowance edges to the inside. I found that it's a bit difficult to sew and turn denim the normal way to make a belt. This way we're cheating a bit but it's so much quicker, easier and it still looks good.
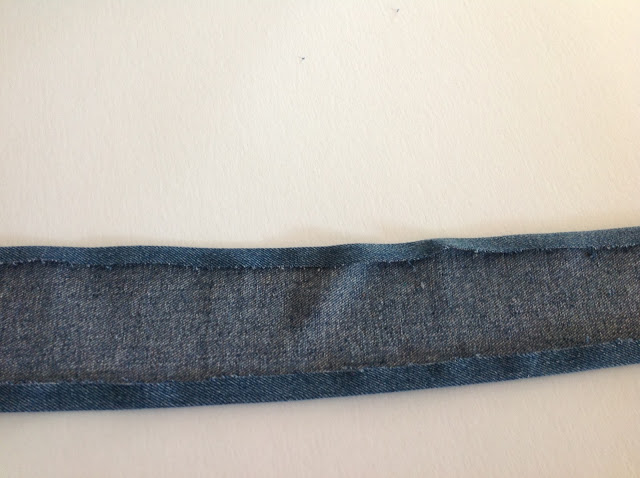
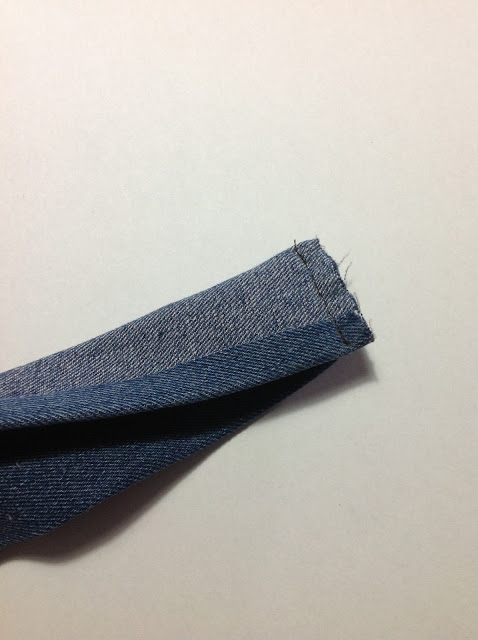
Then turn the corners out so that the wrong sides are on the inside.
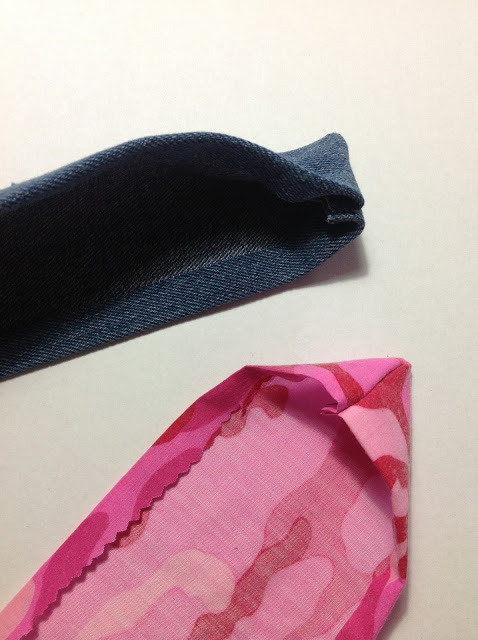
Then line up the edges and stitch the opening closed. The result is a very neat looking belt!
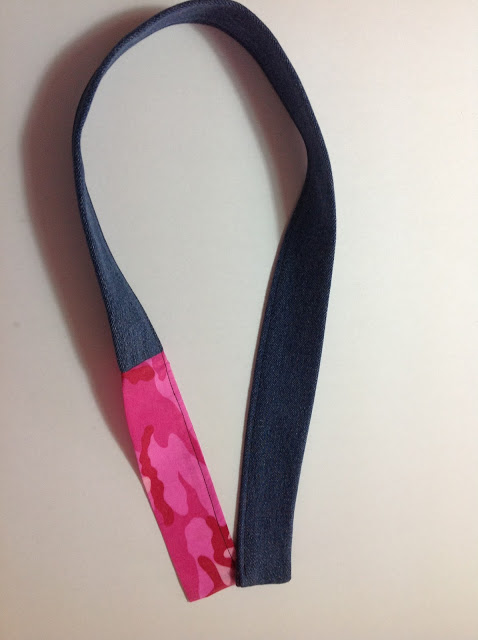
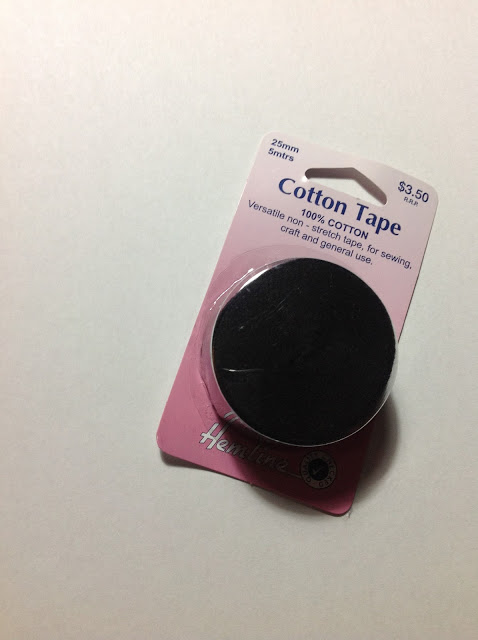
I also stitched velcro onto each end. The next step is to add the loops that hold the bullets to the belt. I have used plain black cotton tape for that since I already had it. Any ribbon or elastic would do the job too.
I stitched the beginning of the roll of cotton tape to the end of the belt and then measured each space by positioning a bullet loosely and then pinning the cotton to the denim. The fitting should be loose enough for a bullet to be loaded quickly, but tight enough not to fall straight through.
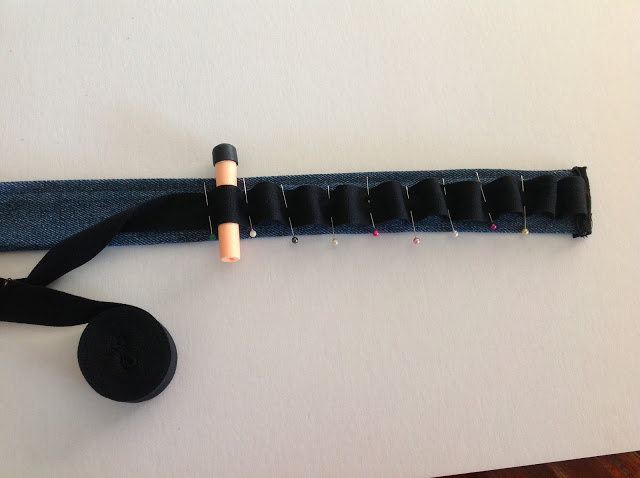
Stitch the tape to the belt at each pin interval. Don't cut the cotton tape from the roll before you've measured and pinned all the loops. When you're happy with the amount of loops, cut the cotton tape, fold raw edge under and stitch in place.
(Look at all that thread. Surely it's not classified as child labour that I made them each trim back the thread on their own belts?)
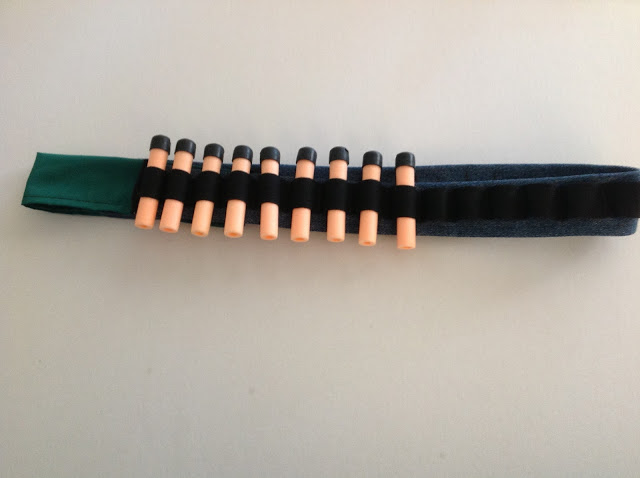
I made loops across the entire length of the belt; the idea being that they can just pull the belt across to the front when they need more bullets. However, after a day of play, I can tell you that it wasn't necessary as the kids completely forgot about that option and only reloaded the front of the belt!
The end result. Pretty snazzy looking ammo belt if I have to say so myself ;-)
The army was pleased. Unfortunately, I still ended up being the chief bullet-picker-upperer, albeit less frequently. Instead my job description expanded to include ammo-belt-bullet-loading. The working conditions and pay's good though... I got shot less frequently and even received some hugs and kisses for my effort :)
Some more pics of my fearsome army. My frangipani tree's save, they protected it well ;-)

Remember to follow Sewing Streak on Facebook and Instagram to see what's new :-)

Ok, this is THE COOLEST THING EVER!!! The boys in my house would go crazy! We'll be featuring this at Someday Crafts tomorrow, so stop by if you have a minute!
ReplyDeleteHi Miranda, I'm glad you like it:) My kids are still using it, so I guess it was a win/win for us:) Thank you for the honour of a feature! I'll definitely stop by to have a look!
DeleteLove this idea. As a mum of 3 Nerf gun loving boys, this will go down a treat!
ReplyDeleteIt sure will:) Happy sewing!
DeleteThis is such a great post. I would like to invite you to link up this post to my Money Saving Monday Link Up so others can find this great idea. Please stop by and link up.
ReplyDeleteI hope to see you,
Thank you,
Stephanie
http://lifesallaboutlittleadventures.blogspot.com/2013/04/money-saving-monday-week-3.html
Hi Stephanie,
DeleteGlad you like it, it's a fun little item:) Thanks for the invite, I'll definitely pop over and have a look!